

Would you like to brighten your window? Today I'll show you how by making a pinwheel suncatcher.
Supplies:
2 sheets of Kite Paper
Paper Cutter
Elmer's Re-Stick Glue

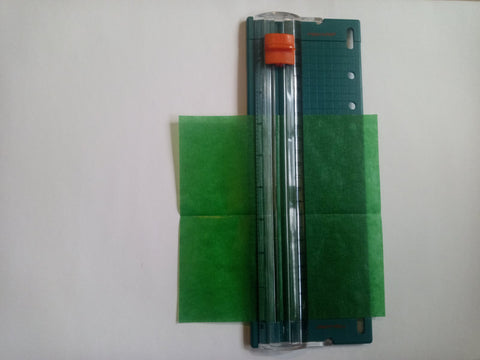
To begin, fold your two sheets of kite paper in half horizontally. Unfold and then fold each sheet in half vertically. Use your paper cutter to cut along the creases. After cutting both sheets, you should have eight squares.

Take one of your squares and holding it at a diagonal, fold it from side to side. Then unfold to make a center crease.

Next, fold the the two side triangle tips toward the center crease and glue in place.

Then fold the two upper sides in and down towards the center so they meet along the center crease. Glue in place.

Finally, take the lower right edge of the point and fold so it lies along the center crease. Glue in place. Repeat the above steps with each of your remaining squares.

To assemble your suncatcher, begin by aligning and gluing the lower left side of one point on the center crease of a second point, with the bottom corners touching. Continue gluing all the way around until you have used all eight of your folded pieces. The Elmer's Re-Stick glue will allow you to reposition your pieces if needed, making your star more precise.

Your suncatcher is now complete! Roll up a small piece of tape and affix it the back of your suncatcher to hang it on your window. These suncatchers look best in dark green, purple, and blue.

2 comments
Cassie, I’m so glad! I think you’ll love making them!
These are so lovely! I definitely want to try these to brighten up some windows.